1. Create a new project.
Projects are used to organize repeatable performance test executions related to the same environment:
- Target website, for example, your-website.com
- Deployment environment, for example, stage or prod
- Performance test type, for example, load, stress, scalability, etc
Please create a new project,
supply any desirable project name and optional notes describing details of the project.
Project should be created only once for all related load tests,
so feel free to skip creating a new project if you already have one.

2. Download prebuilt example.
Our dev team implemented several open-source load generators
to simplify your experience integrating with the platform.
The most straightforward load generator to start with is
"Codeless Load Generator". Such a load generator
allows you to prototype load test(s) quickly
without complex scenarios programming.
The only skills you need are understanding
YAML format and basic knowledge of css selectors.
Please download prebuilt example,
unarchive it and start editing config.yml
with your favorite text editor.
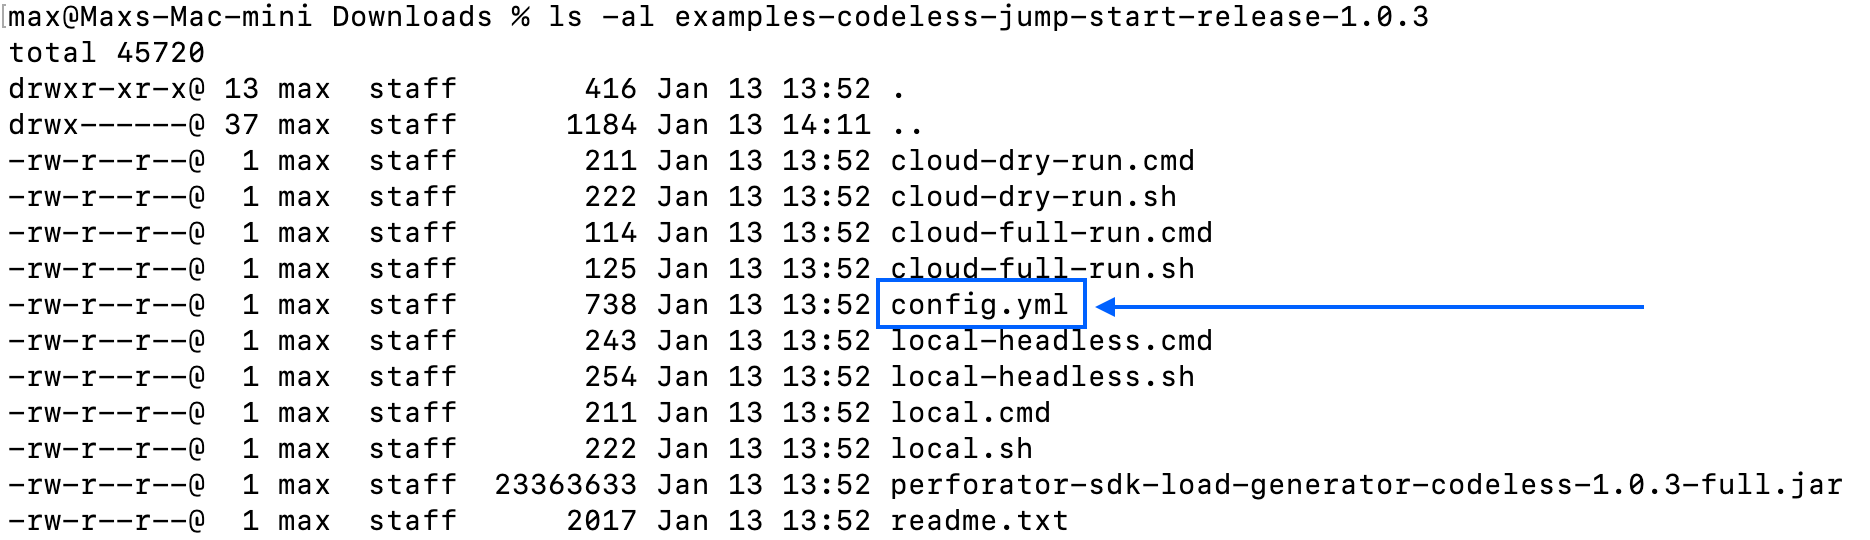
3. config.yml - update Project Key.
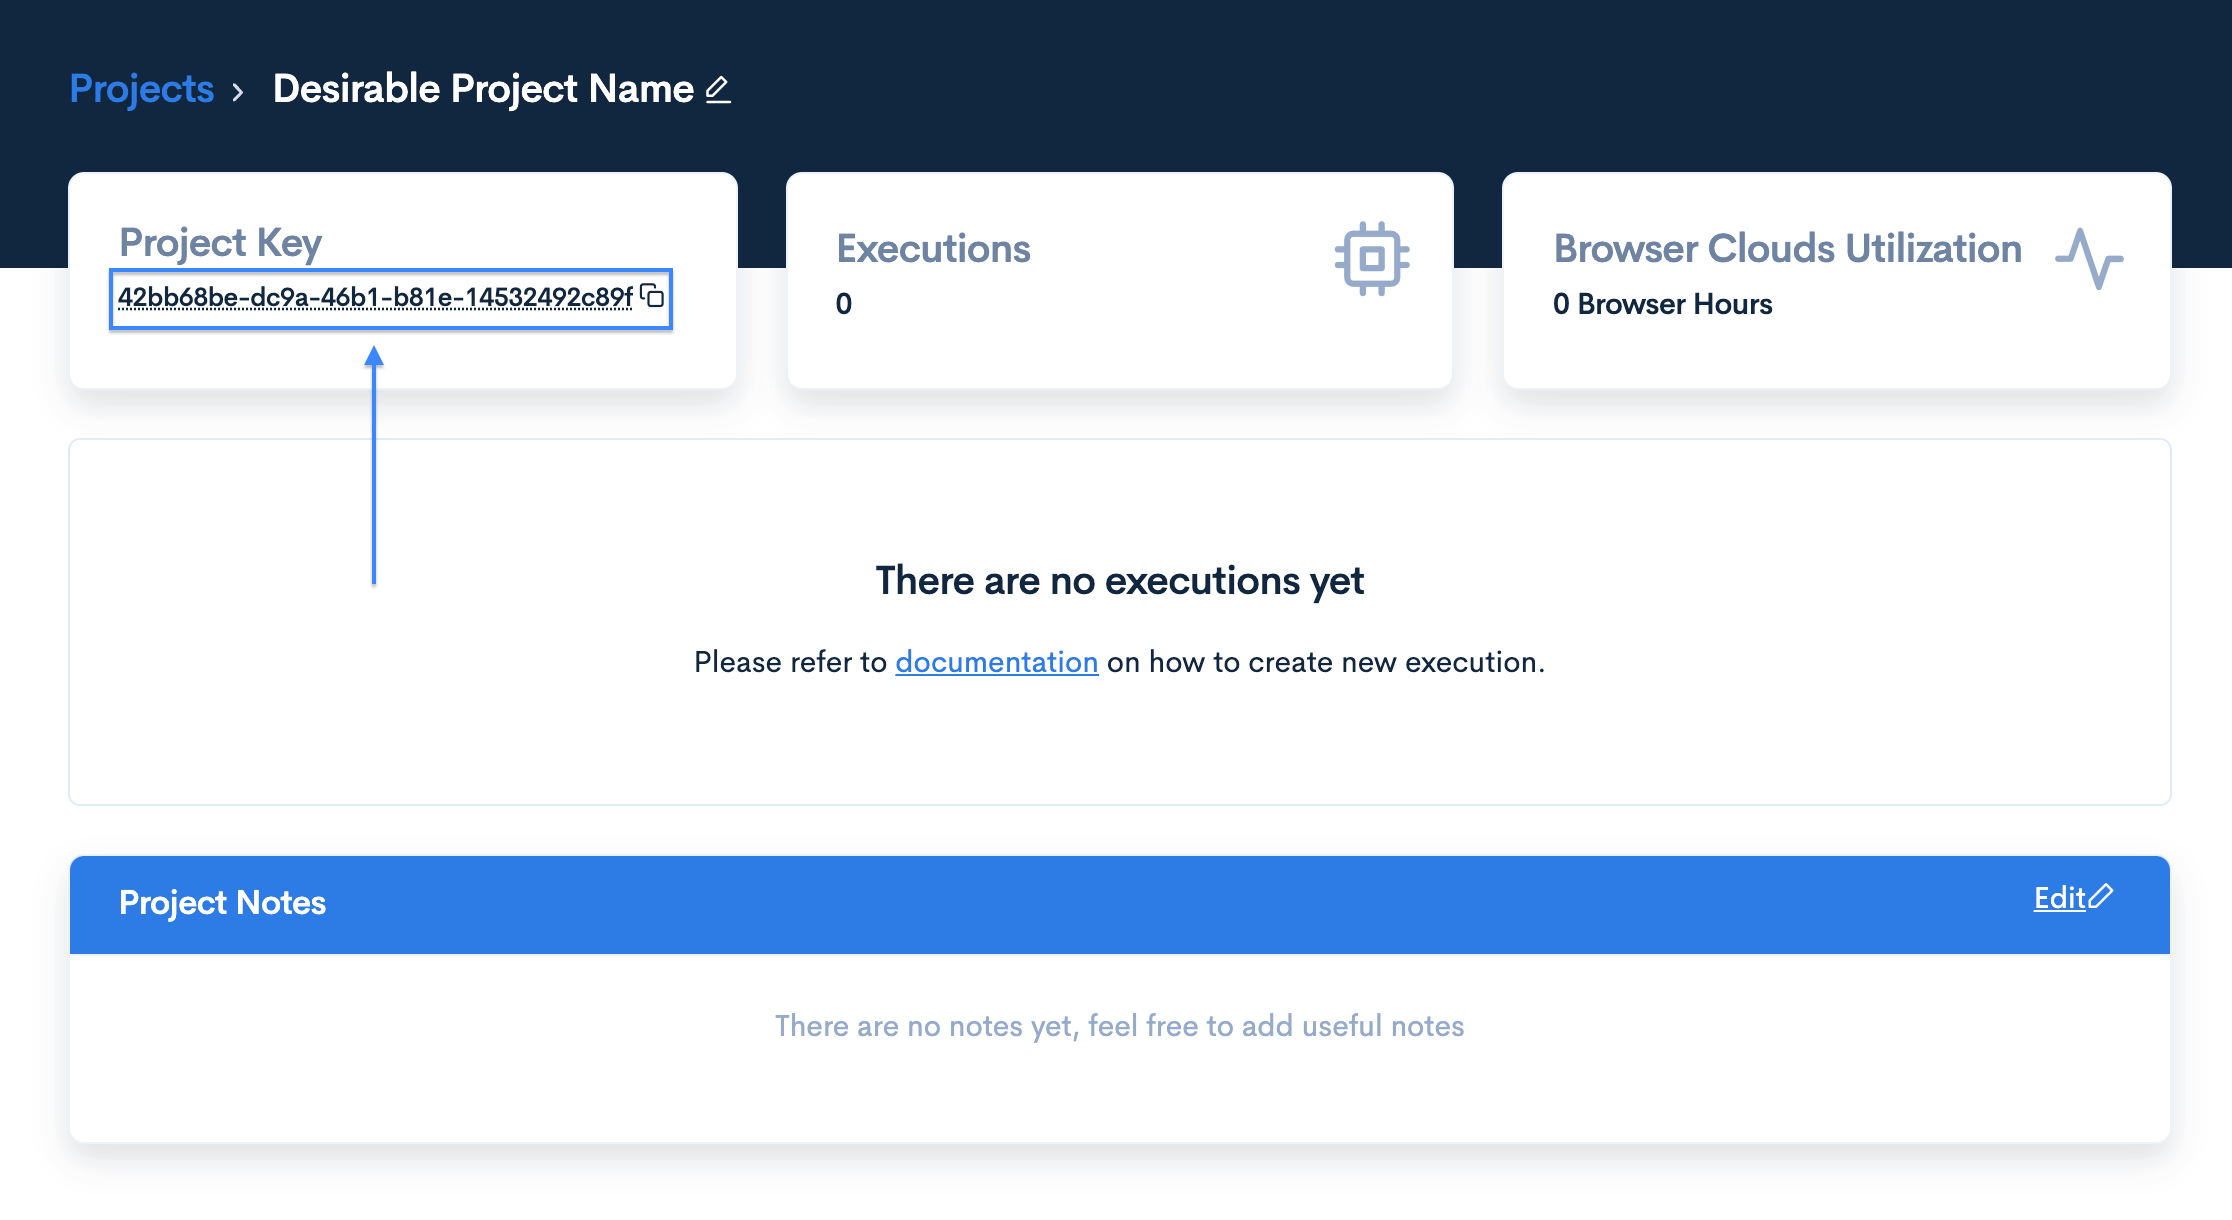
Every project has a unique identifier - project key,
and it is available in immutable UUID format once the project is created.
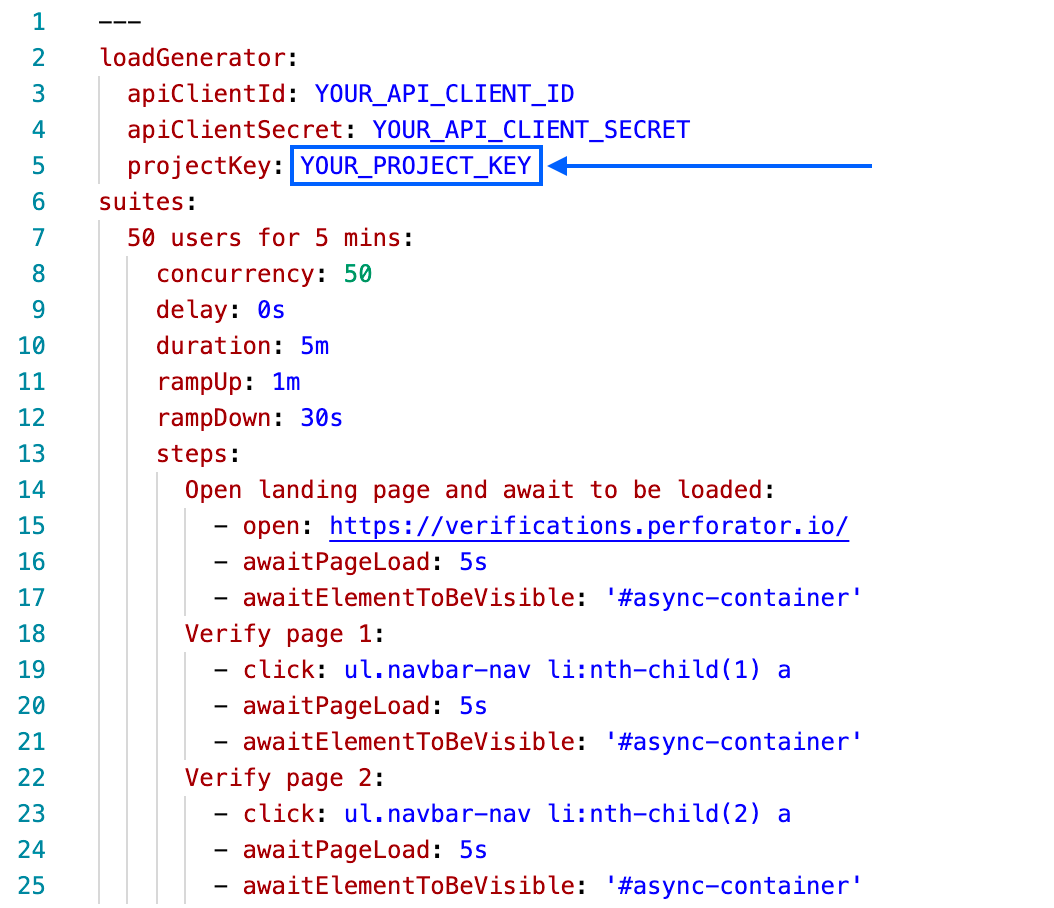
Project key is a mandatory field for every load test configuration,
and it tells the load generator where to store new executions data.
Please copy the project key from the project details page and update it in your config.yml
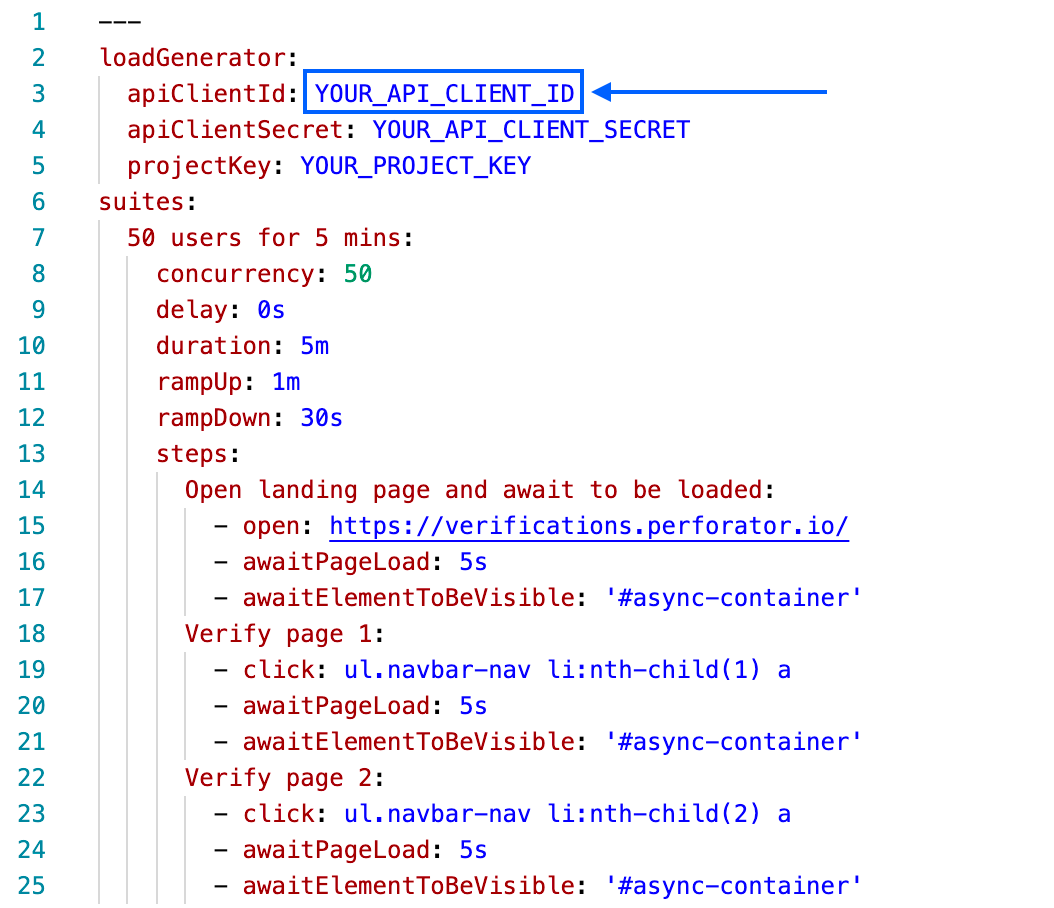
4. config.yml - update API Client ID.
Load generator tightly integrates with the
Perforator platform communicating via API requests.
We treat security as a first-class citizen,
so all API requests require proper authentication
and authorization.
You have your own API Client ID,
which uniquely identifies your account in our platform.
Such key stays unchanged the whole time
while you are still active with us.
Please navigate to the API Settings page to get your own API Client ID
and update its value in your config.yml.

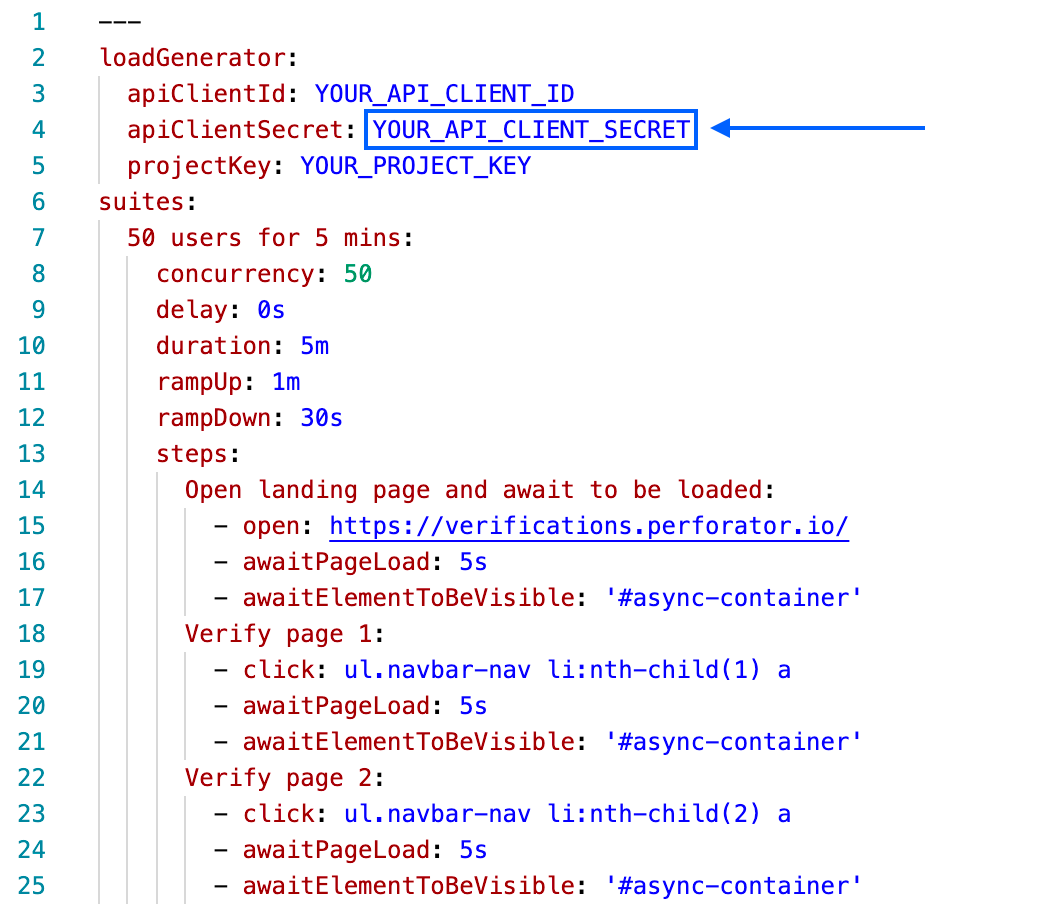
5. config.yml - update API Client Secret.
Perforator API authentication scheme requires a valid pair
of API Client ID / API Client Secret.
While client id acts as your account identifier,
client secret is like a password for API-level calls.
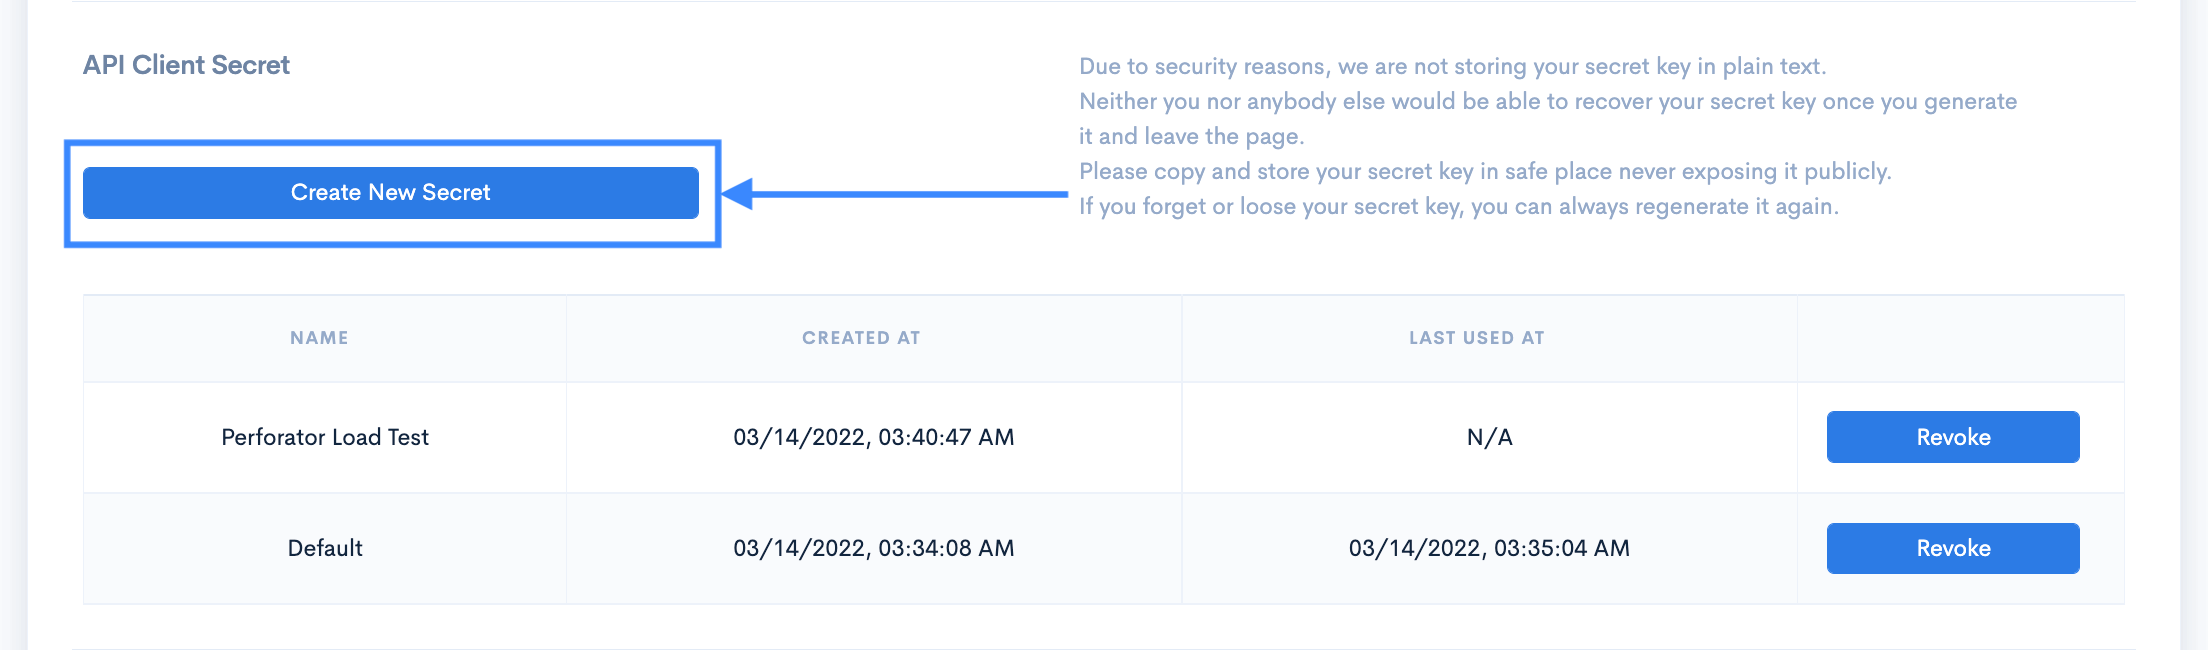
You can get a new API Client Secret
via navigating to the
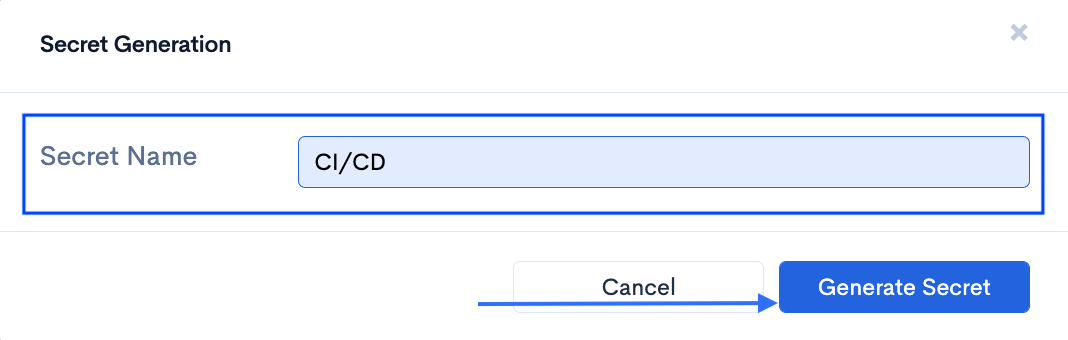
API Settings page and clicking the "Create New Secret" button. Then after providing a suitable name for your secret,
clicking "Generate Secret" will generate a new secret for you.
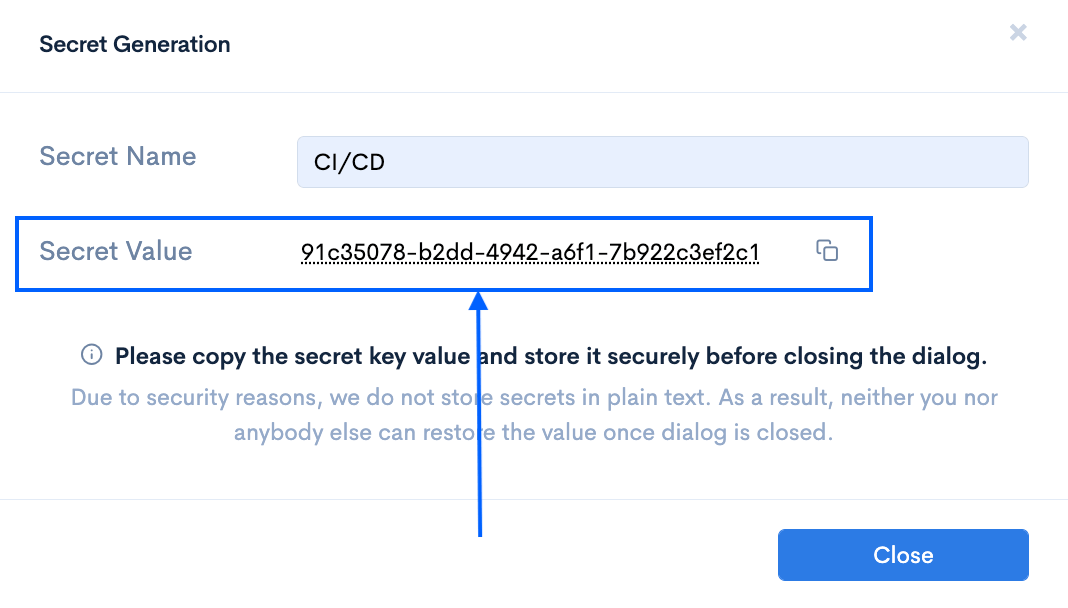
Please don't forget to update your config.yml once you get your secret key.
Note:
Please copy the secret key value and store it securely every time you create one.
Due to security reasons, we do not store secrets in plain text. As a result, neither you nor anybody else can restore the value once dialog is closed.
6. Verify execution locally.
It is suggested to verify execution locally
whenever you make any changes in your configuration file.
The prebuilt example comes with a set of handy scripts
targeted to execute config.yml with the different goals.
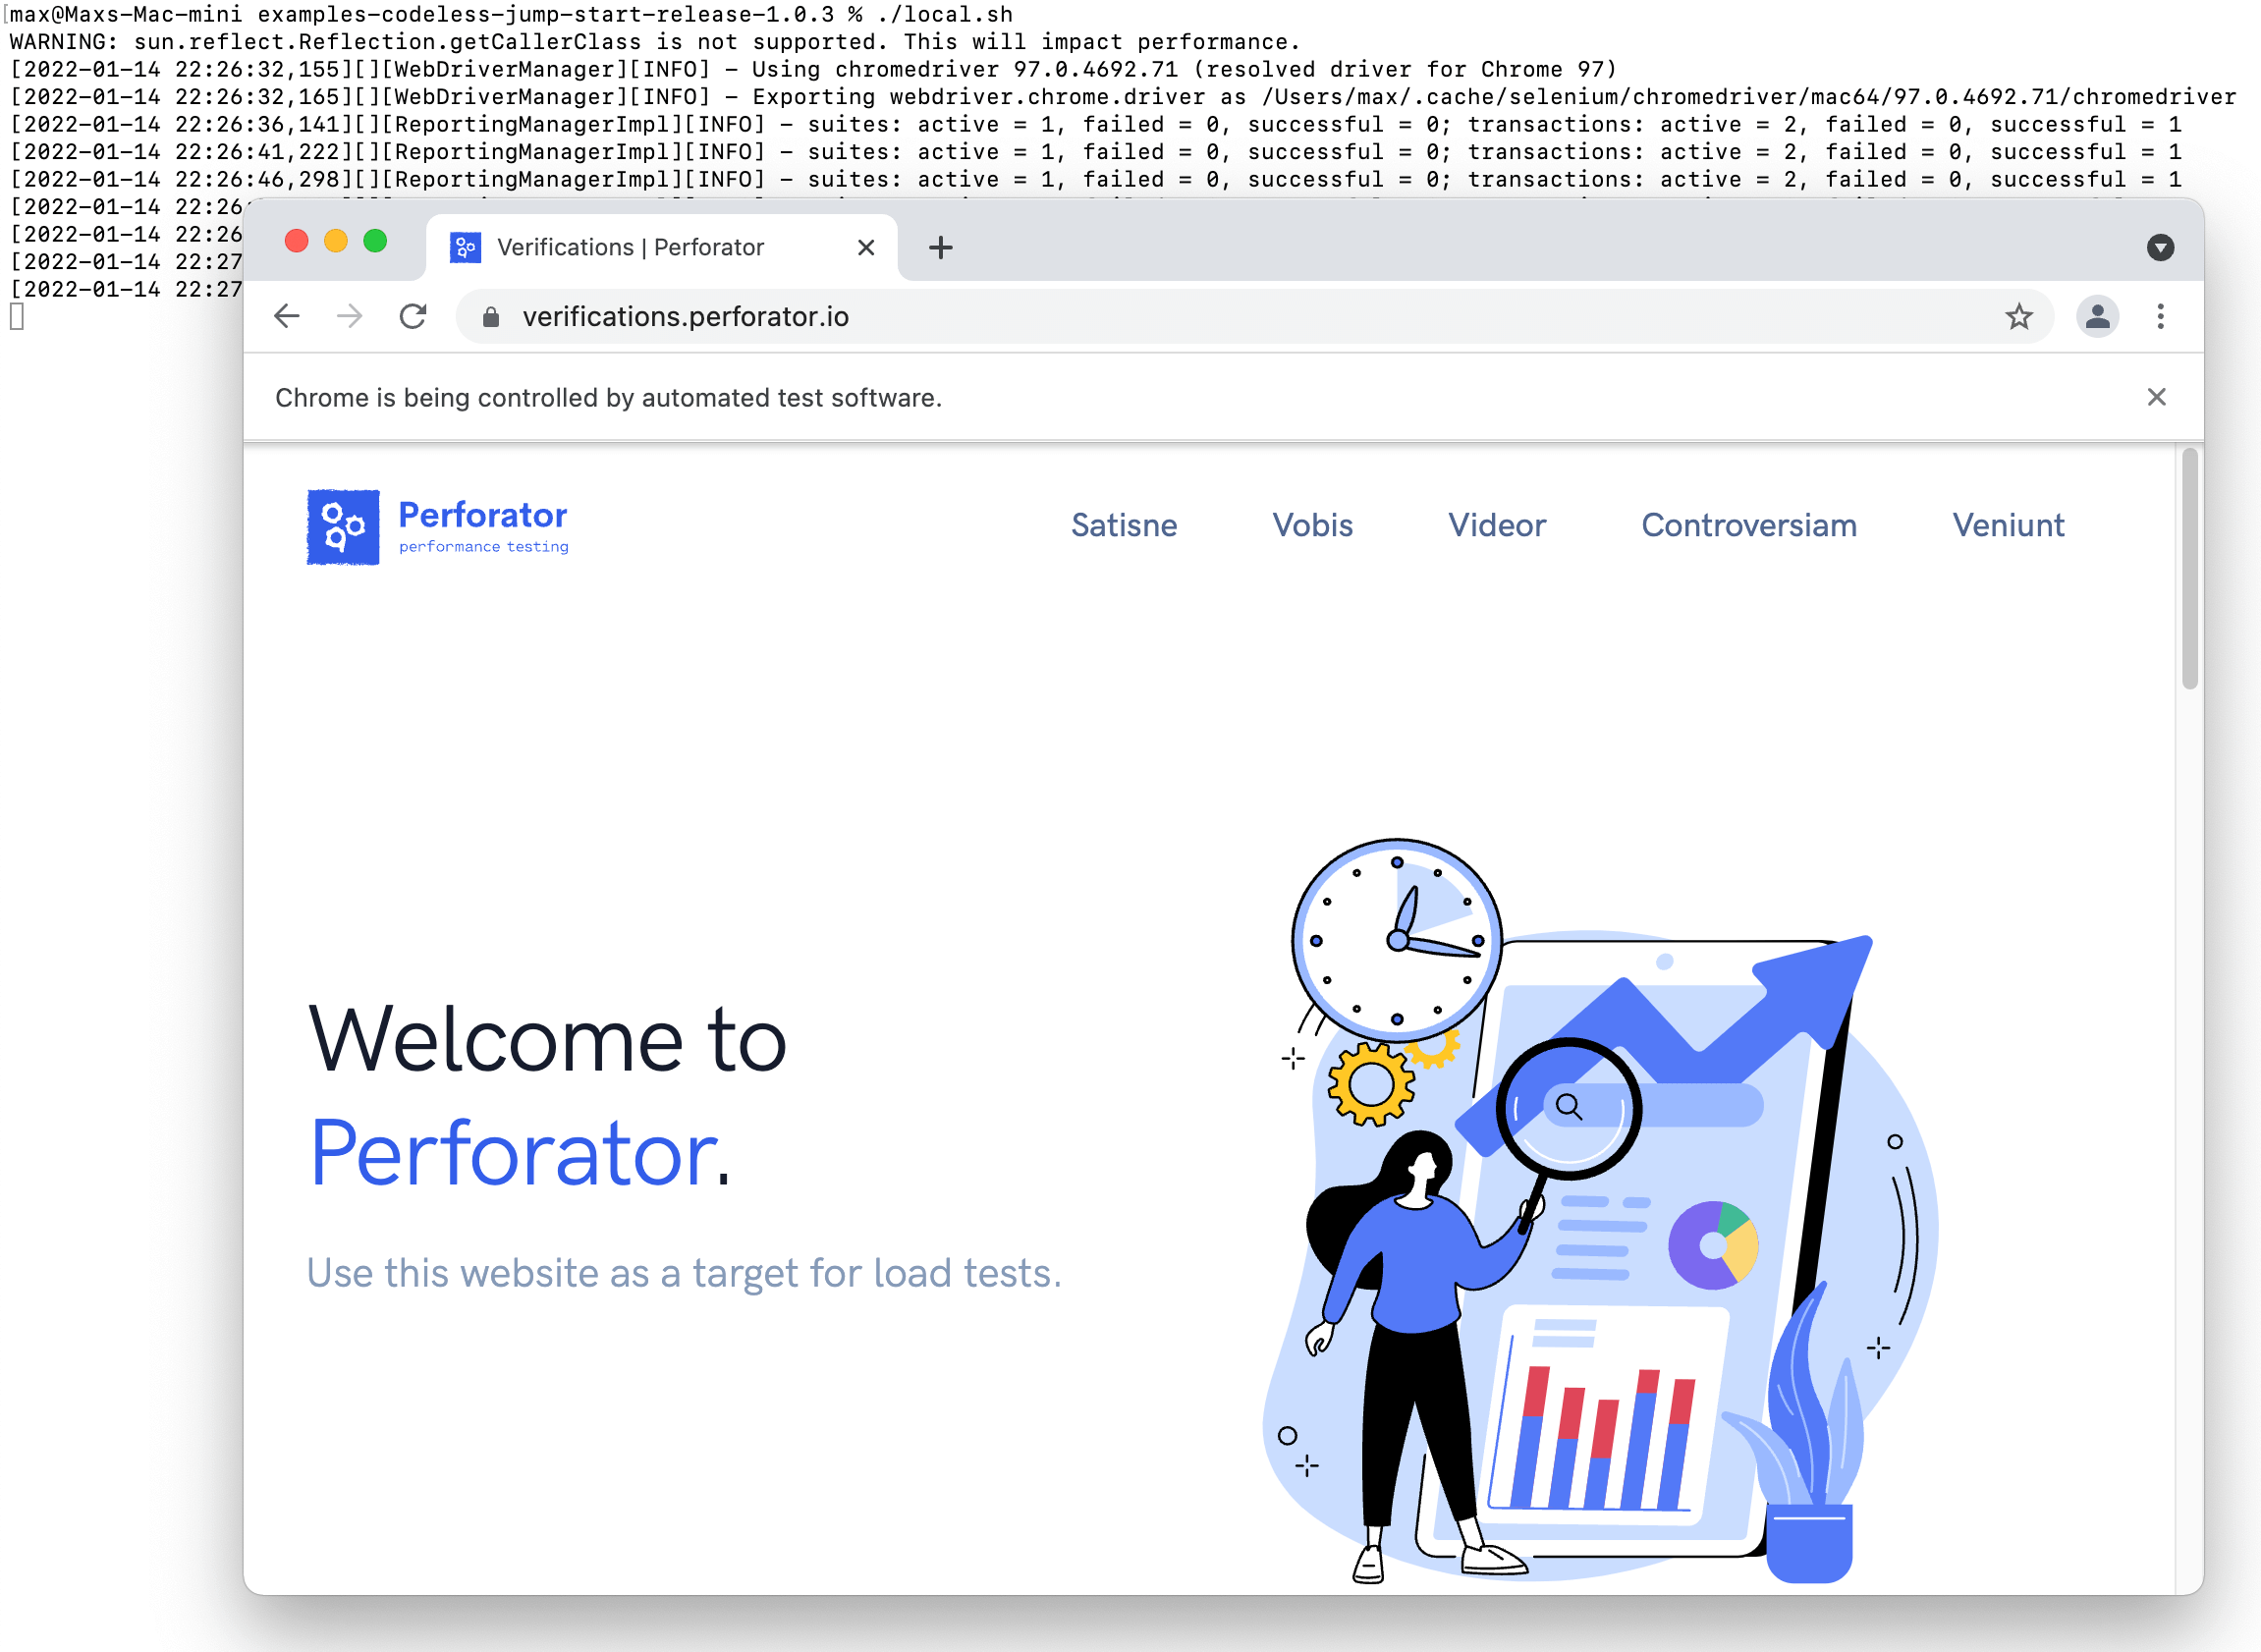
- local.sh - executes your config.yml using Chrome browsers started locally.
This script is helpful to debug and visually verify that everything works as intended.
- local-headless.sh - it has the same purpose as local.sh,
but valuable for CI/CD environments where a graphical environment is unavailable.
- cloud-dry-run.sh - it processes your configuration file using only 10 browsers started in the cloud.
The main idea of this script is to avoid extra charges
when you need to ensure that actions are executed correctly in cloud-based browsers.
For example, it is not optimal to run your full-powered configuration using thousands of browsers and then,
in a minute, realize that you have a simple mistake in css selector.
- cloud-full-run.sh - executes your load test at full speed as defined in config.yml.
There are .cmd equivalents for all .sh scripts, so please use cmd scripts in a Windows environment.
Note: Local execution doesn't create any resources in the cloud, so neither browser clouds are created
nor advanced statistical metrics are submitted - you can verify the logic only visually using a local browser.
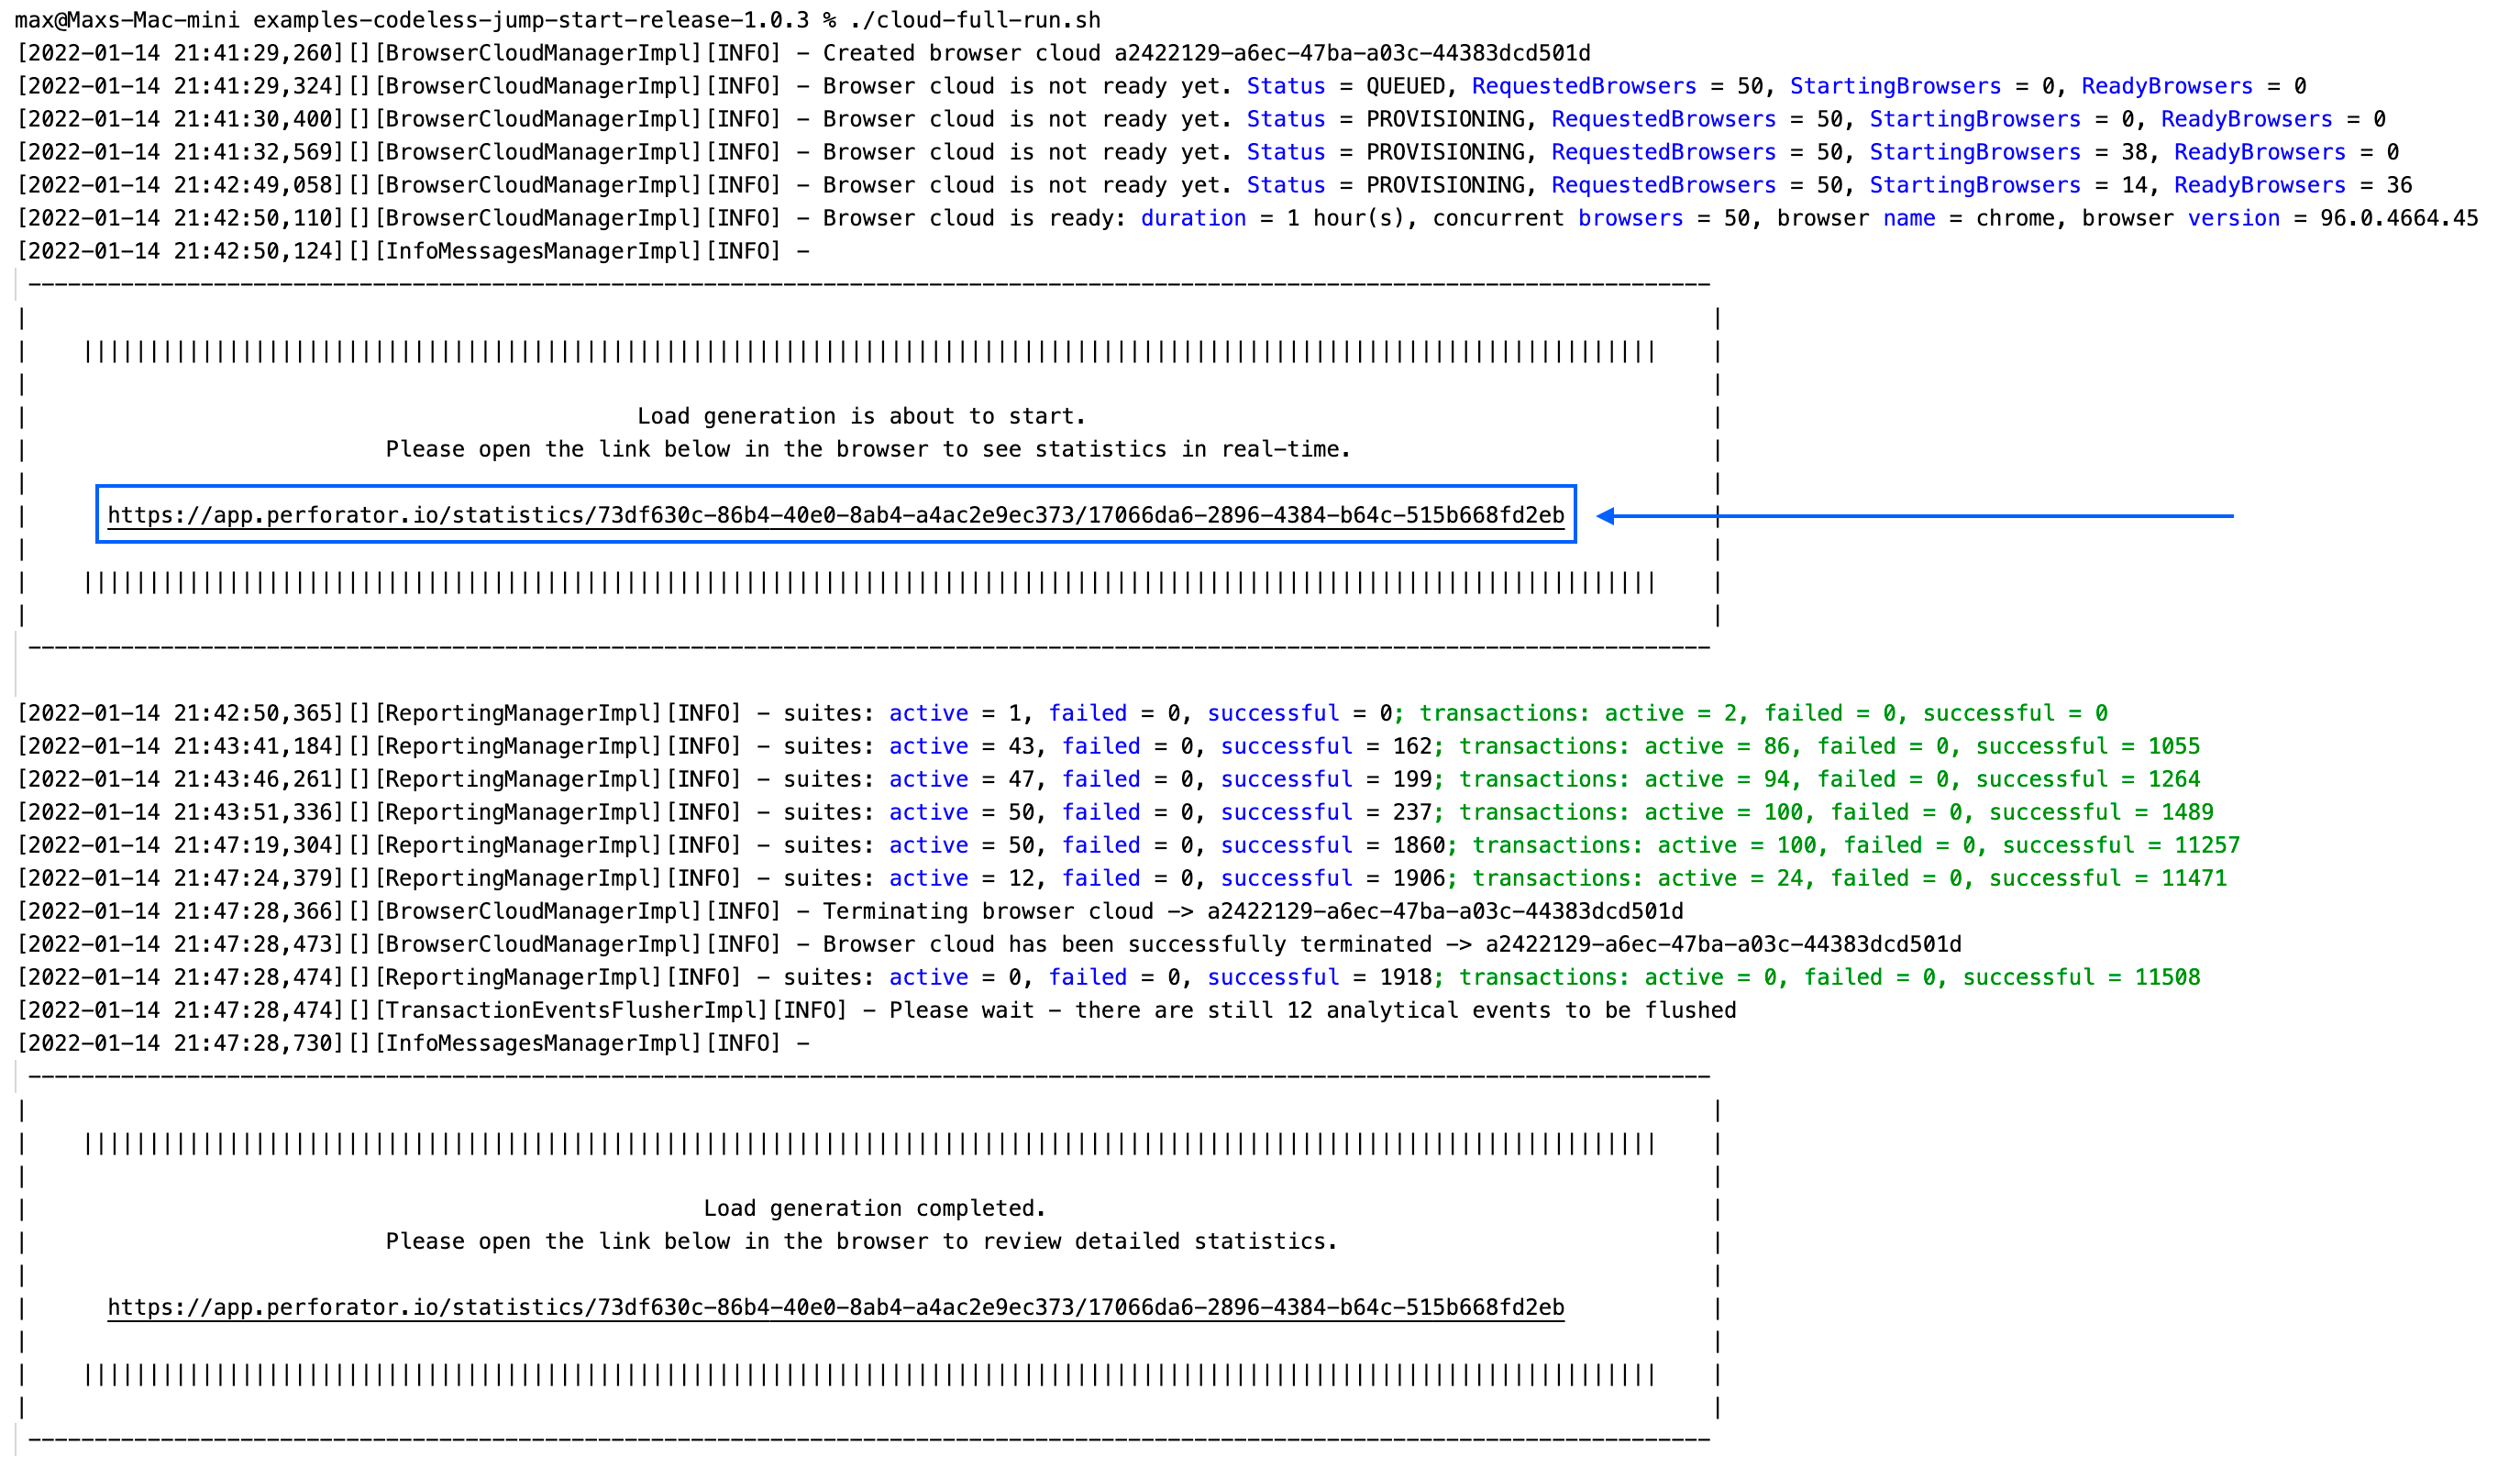
7. Run at full speed.
Please execute cloud-full-run.sh(or cloud-full-run.cmd on Windows)
to process your configuration file at full speed using browsers started in the cloud.
Browser cloud is created on-demand, so the load generator waits automatically
till all hardware resources are provisioned and initialized successfully.
You should be able to see the actual state of the browser cloud and its progress in the logs.
Load generator starts processing actual load test logic only when browser cloud is ready,
and you should see a dedicated log message stating the same.
The load generator also prints a direct link to view statistics in real-time,
so please copy and open it in your browser.
Note: Please keep in mind that only browsers are started in the cloud
while the actual execution of the load generator is happening on your own computer/server,
so you should have enough network bandwidth and hardware resources allocated to the load generator itself.
Otherwise, you might see strange bottlenecks in load test results.
Every 500 browsers allocated in the cloud require 2 CPU cores and 20 Mbps networking on a load generator side.